


Saturday 5 May 2007
I have been known to kill Sim babies merely because I did not like the skin they inherited*, but that was before I learned how to change skin and eye colors of existing Sims using SimPE.
* By “did not like” I mean “could not stand children with red teeth”.
In the interest of sparing others’ Sim children from unnecessary death, here is how I do it. There may be an easier way with SimSurgery, but I like to fiddle with my Sims’ genes anyway, so this technique is fine for me.
How-To
Load the Sim
- Load your neighborhood in SimPE (using Tools —> Neighborhood Browser). You might want to make a backup while you have the Neighborhood Browser open. Don’t say I didn’t warn you.
- Once it has loaded, in the top left pane, select “Sim Description”.
In the top right pane, click on the “Type” bar at the top to sort by name. Then scroll down to find the Sim you want to modify, sorted by first name, and select him.
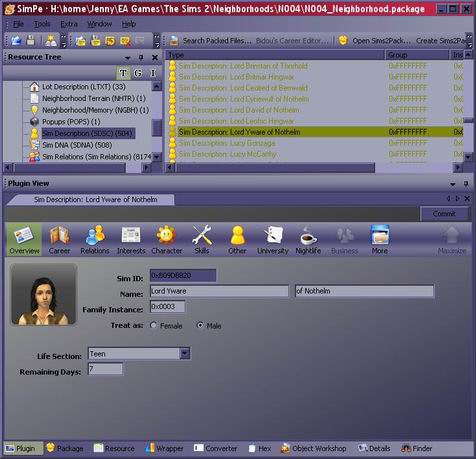
To Change Skin Color
In the bottom pane, click on “More” and select “Open Sim DNA”. This will open a new tab with the Sim’s DNA selected.
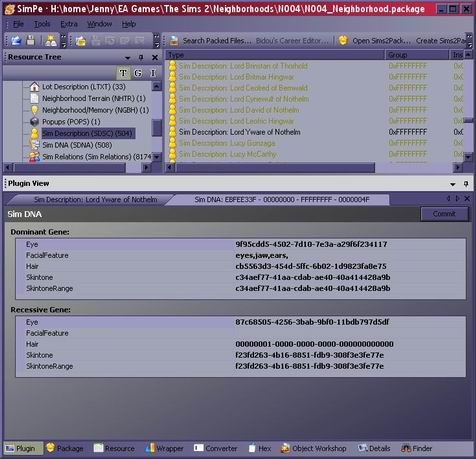
- The values we want to change are in “Dominant Gene”. To change the skin, select the “Skintone” GUID. Replace the value that is there with the value of the new skin (see below for how to find that). * the long, crazy string of letters and numbers
- Click the Commit button, then in the menu do File —> Save.
To Change Eye Color
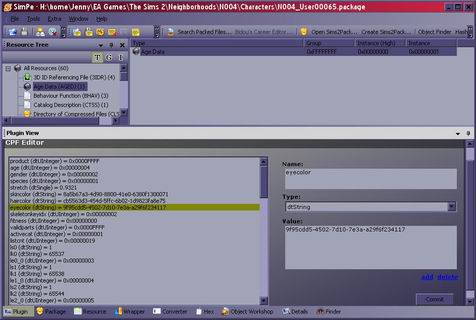
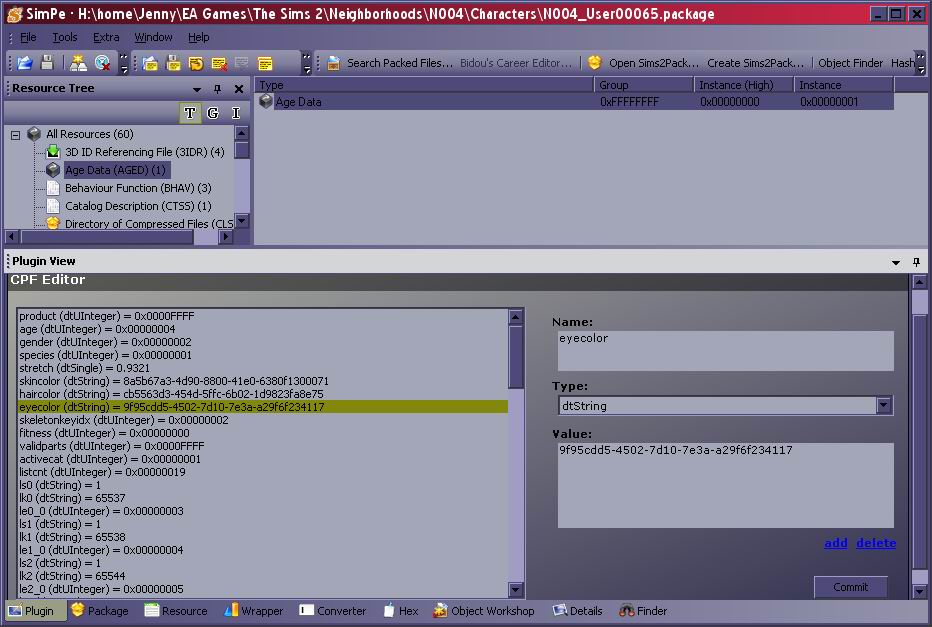
(First close the Sim DNA if you also just changed the skin.) While viewing the Sim Description of the Sim you want to modify, Click on the “More” button and select “Open Character File”. When this is loaded, in the top left pane click on “Age Data”, then in the top right pane click on “Age Data”. At the bottom you should now have a list of values, including “eyecolor (dtString)”. Click on that value you want to change, and in the right portion of the bottom window change the “value” to the GUID of the eye you want to use.
- Click on the Commit button and then do File —> Save.
Force Changes to Appear
The changes may not show up right away in the game. If they don’t, have the Sim go to a mirror and change appearance. You don’t have to actually change anything, but you do have to accept the changes (i.e. don’t click the X to cancel the changes). Normally, once the change appearance screen goes away, your Sim will be repainted with the new skin or eyes.
This makes it difficult to change a baby’s eye color till he’s a toddler (if you have a toddler-enabled mirror that is), but I have successfully changed babies’ skins this way. For babies, at least, the skin seems to be reloaded as soon as you enter the lot.
To change a baby’s eye color, then, you can use the Insiminator’s Temporal Adjustor instead of a mirror. Do Fix Appearance… Make Over on the baby, and save the changes (even though you won’t change anything). The only drawback to this method is that in thumbnails and preview pictures (i.e. the family portrait displayed when loading the lot) the baby will thereafter appear with a blank spot where hair would ordinarily be, as when a hair mesh is missing. However, in the game he will appear with a normal bald baby head.

But where do I get the values that I put in these fields?
If you just want to use one of the Maxis default skins, here are the values:
00000001-0000-0000-0000-000000000000 (very light)
00000002-0000-0000-0000-000000000000 (light)
00000003-0000-0000-0000-000000000000 (tan)
00000004-0000-0000-0000-000000000000 (dark)
I don’t know the values for default eyes, though they probably look a lot like that.
If you want to use a custom skin or eye, there are two ways to get the value.
The easiest is to take a Sim who you know already has the skin or eye color that you want to apply to the other Sim. Before you open the DNA of the Sim you want to change, open that other Sim’s DNA using the same steps listed above. Select and copy the GUID for the “Eye” or “Skintone” field, making sure you get the Dominant Gene and not the recessive. Then close this Sim’s DNA (to limit confusion), open the other’s, and paste the value into the appropriate field.
The other way only works if you know the file name of the eye or skin package, but it permits you to change the skin even if you don’t have a Sim using it already, which SimSurgery won’t let you do.
- In the menu, do File —> Open and browse into your download folders to find the eye or skin package.
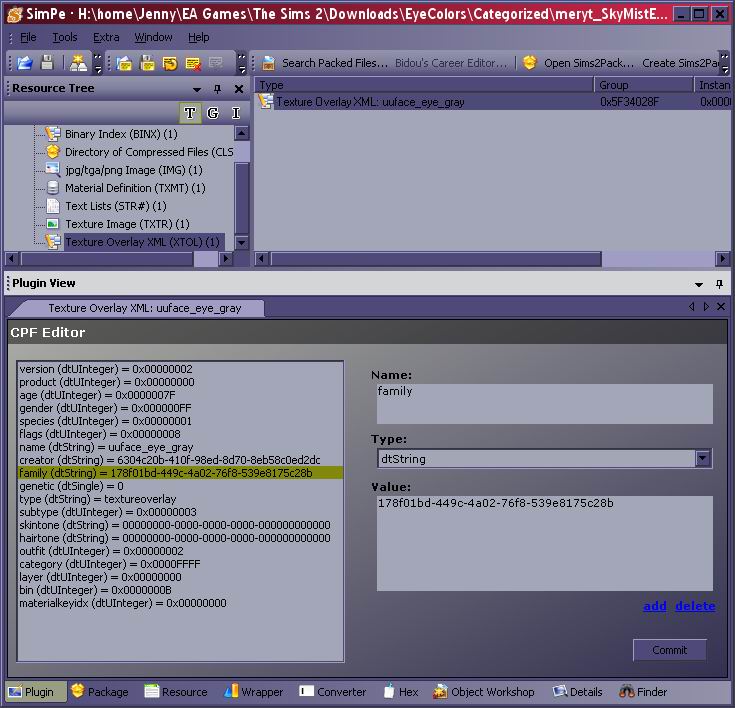
In the top left panel, select “Skintone XML” (if it’s a skin) or “Texture Overlay XML” (if it’s an eye), and then select the same in the top right panel. My example is looking at an eye.
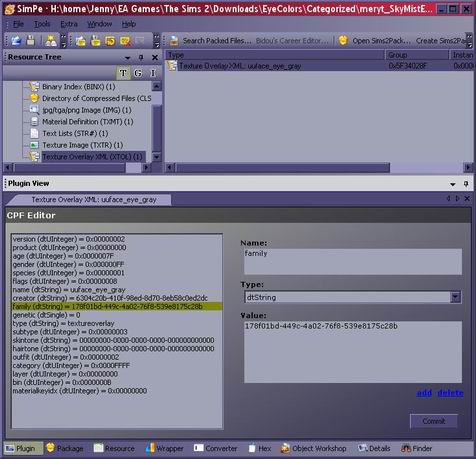
- In the bottom panel, find the field “family (dtString)” and select it.
- In the right portion of the bottom panel, there should be a GUID in the “Value” field. Copy that and paste it into a text file for safekeeping. Personally, I have a growing list of these values that I add to whenever I look one up, to save me this step the next time around if I want to give someone else the same skin or eye.
- Now open the Sim and change the value according to the instructions above, starting at Step 1.
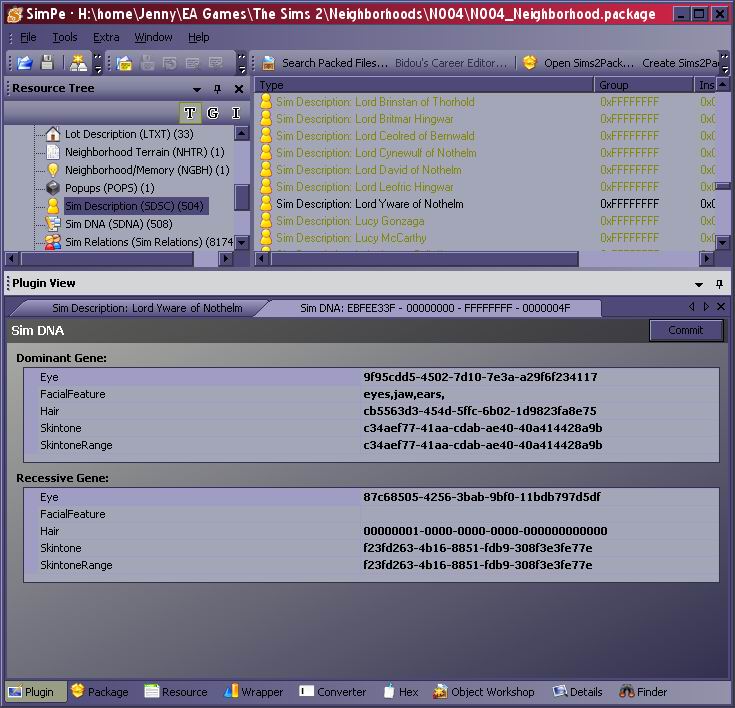
What about the “SkintoneRange” field?
A newly created Sim from CAS (who was not created using the pacifier) will have the same values in both the “Skintone” and “SkintoneRange” fields. A Sim born in-game to parents with different skintones may have different values there, so I assume it has something to do with the game’s genetics. I have successfully changed Sims’ skintones without changing the SkintoneRange field; however, if you are doing a radical change from very dark to very light or vice versa, you may wish to change both fields to the same value so you don’t get some weird results in the next generation.

Thanks again Lothere! I was having a hard time puzzling out what do with the skintones and particularly where to find the values. Now I am really off to play with simPE.