


Sunday 5 August 2007
Verity has asked how to extract a Sim’s picture from his character file. This is how I get the pictures I put on the bio pages, so I do it all the time. Here’s a quick step-by-step.
How-To
Load the Sim
If you already know the package file for your character (such as Neighborhoods\N0004\Characters\N0004_User00065.package), then you can simply start SimPE and open the file directly using File —> Open. If not, here’s how to open the character by browsing through all characters in the neighborhood.
- Load your neighborhood in SimPE (using Tools —> Neighborhood Browser).
- Once it has loaded, in the top left pane, select “Sim Description”.
In the top right pane, click on the “Type” bar at the top to sort by name. Then scroll down to find the Sim you want to modify, sorted by first name, and select him.
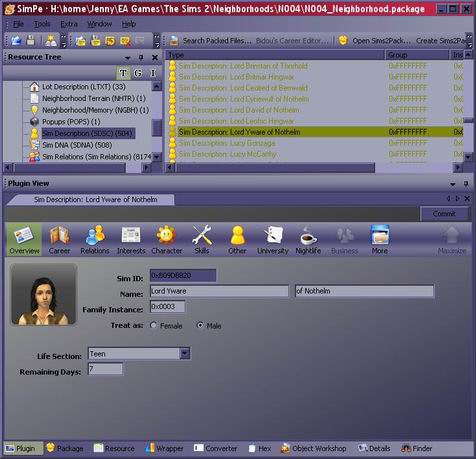
- In the panel at the bottom, click the “More” icon. (I think it is supposed to be a filing cabinet, but for some reason I always think of it as an oven…) In the menu that drops down, select “Open Character File”.

Extract the Picture
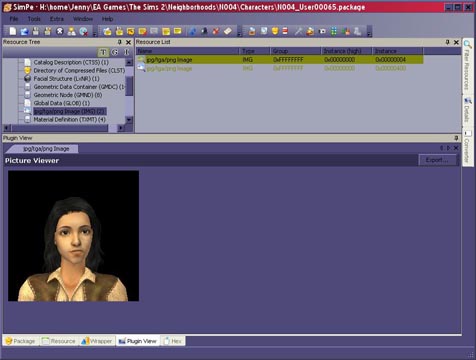
- When the character file has finished loading, in the top left pane click “jpg/tga/png Image (IMG)”.
In the top right pane there will be one or more entries called “jpg/tga/png Image”. There always seems to be an even number, and only half of the entries actually seem to contain images. Sometimes there will be more than two, and these will be other life stages of the Sim. I don’t know why some Sims have their old baby pictures hanging around and others don’t—possibly due to using or not using InSiminator to age them?
Anyway, it is easy to tell which is the resource you need: simply click on each of the entries, and the ones with pictures will display in the bottom pane.
There are two ways to extract the picture.
- The easiest is to click on the “Export…” button at the top right of the bottom pane. This will allow you to save the file as a PNG image somewhere on your computer.
The other way is to right-click on the appropriate resource entry in the top right panel, and in the context menu select “Extract…” Again, you can save it anywhere, though this method will propose a long string of letters and numbers as the file name. You can change the filename when you save it, but make sure you give it the file extension “jpg”.
Be aware that if you save Yware.jpg, for example, using this technique, you will also get a file Yware.jpg.xml in the same directory. This is just a small text file you can delete afterwards.

Yes, for some reason the “Export” function gives you a PNG file and the “Extract” function gives you a JPEG. The compression artifacts are there either way, so you won’t get a better quality saving as a PNG—you will simply get a bigger file. I use the Export function for that reason. If I did not, I would still convert them to JPEG later using an image editing program, and possibly lose quality that way. It’s a lot easier for me to export as JPEG and delete the extra XML files later.
If it works, you will end up with a 256x256px file that looks like this:
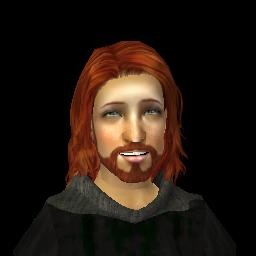
It should be the same picture that appears (in a smaller version) as the Sim’s thumbnail when you are playing the game, so if it is a dorky pose, you can always go into the game and change his appearance with a mirror. It will regenerate the picture if you save the changes.
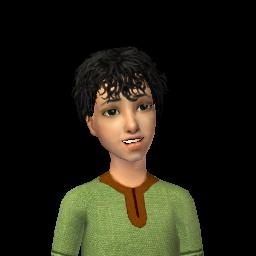
Some of the kid pictures are awkwardly cute, though… just like 2nd grade school pictures. Comb your hair! Smile with your teeth! Cuuuuute!
Whoops! I just realised I thanked you for this elsewhere but not here... but thanks! This is really helpful. I knew there must be a way but I am so bad at figuring out these things and sometimes you just can't figure out what the right phrase to type in is on google. And this fantastic tutorial has the added bonus of... a picture of Brude! Hurrah! I wish I would actually end up with a file like that