


Monday 19 March 2007
Tiana gets a second request granted right away, but since she is starting a new story that may involve caves I wanted to help her out by showing how I built Kiv’s cave. (A story about cave-dwelling dwarves?) Hopefully it will interest some of the rest of you.
Unlike most of my lots, Kiv’s cave really is something of a “set” in the Hollywood sense. It is not set up to be a realistic cave (or even a playable lot), but only with story-telling in mind. My castles look like real castles, as we shall soon see with Egelric’s, but one can only go so far with cave-building in The Sims without resorting to cheats and tricky camera angles.
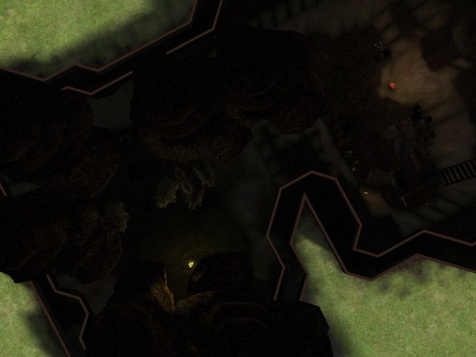
Here is an aerial view of the cave on the lowest elevation:
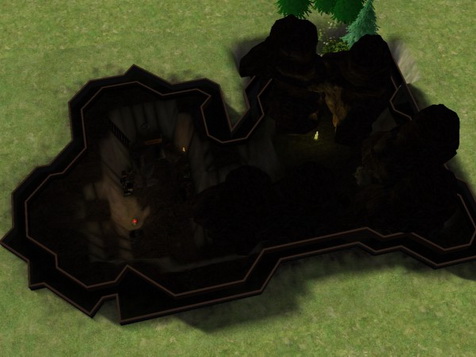
The first thing to note is that this set is actually two caves in one. The left half is Vash’s hideaway, in which, for example, Iylaine found Vash, Vash nearly killed Malcolm, and Vash had a chat with Kiv. It is also the cave to which young Vash took Egelric after saving him from the ice, although in terms of the story it is not really the same cave.
On the right side is Kiv’s cave. In the story, of course, the two caves are not connected at all.
The entrance is by the trees in the upper right of that picture. Here is another view looking down from the entrance side:
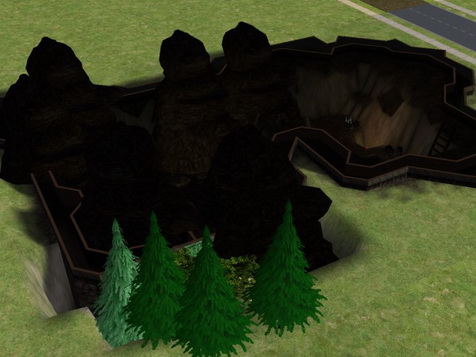
Notice that Kiv’s cave is actually a basement. I created an enclosed area using the foundation tool to make walls that are one square wide all around. Then I excavated the basement using the lower terrain tool. If you use this technique make sure you test the height of the basement before you start decorating. It must be at least one wall-height high wherever you want Sims to walk and move freely.
Here the second story walls are up:
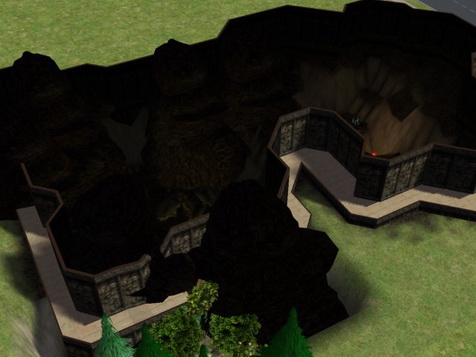
This is a second layer of ordinary walls all around the edge of the foundation, with the width of the foundation on the outside. Thus from the inside it looks like a sheer two-story wall. The walls of both stories are painted with a very dark stone-like texture so it doesn’t stand out in the pictures at all.
You don’t really need walls at all if you dig a nice, deep hole, except for the fact that you will probably want a roof:
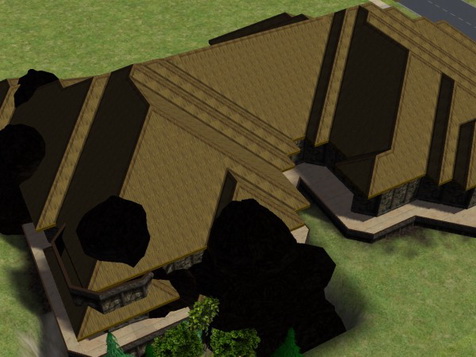
The inside surface of the roof texture should be as dark as possible so that the roof of the cave appears black in the low lighting. I have also found that a roof placed directly on foundation can be a little buggy, which is why I included the extra story of walls.
However, if you aren’t a ceiling person like I am then you’re probably used to taking pictures to avoid shots of the sky, so I suppose the roof is optional.
Now, I use foundation walls for the “ground level” because you can make the ground slope up against foundation walls almost to the top of the foundation, whereas ordinary walls (without cheats) must be on top of level ground.
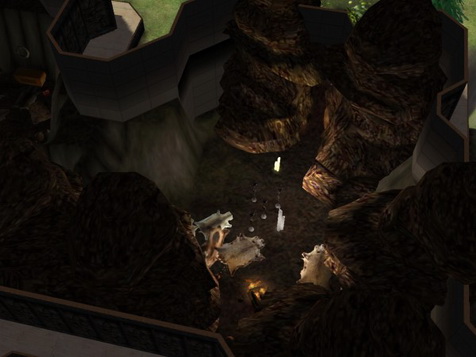
In Vash’s cave, in the right half of the above picture, I left a wide border of un-sunken ground all around the inside of the foundations, so I could have used ordinary walls for this cave. Here is another, slightly-better lit picture with Vash’s cave on the left:

(For this shot I painted the walls with white tiles so they would stand out a little better.)
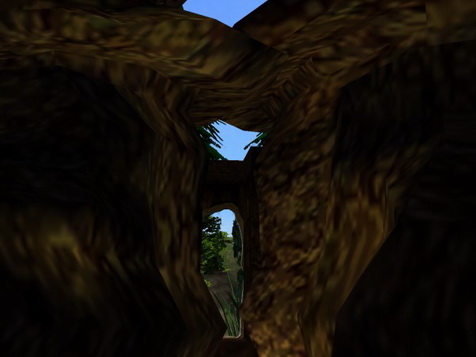
However, you can also make the cave floor slope up against the wall at varying angles to get a different effect, as seen in this shot from Kiv’s side of the cave:
(I will get to the two blobs of rock on either side in a minute.)
I have a bug with my video driver that doesn’t let me take advantage of terrain paints (they work, but they are painted at 20x magnification or so), but I’m sure one could do something nice with the ground sloping up the walls and painted with rock textures.
There is a disadvantage to the use of ground that slopes high up the foundations, however. Even with the camera hack I use, it seems impossible to lower the camera below the surface of the ground. Thus if you try to back the camera up towards the wall, it will eventually start to rise as the “cameraman” hits the slope.
This can make it quite difficult to get a good low or even head-level shot if your camera is pointed from the wall into the center of the cave. And it is nearly impossible to get the camera down into a narrow passage. If you look at the first pictures in this chapter, I could not get the camera any lower when I took those pictures of Iylaine, so the shots are from high above her.
Therefore if you use sloping ground to make the “walls” of your cave, it is best to make a cave with a large open area in the middle, and plan to take most of your shots from the center of the cave facing towards the walls, at least if you like to get up close to your Sims.
One way to avoid this problem would be to build normal walls and then use rock-like objects to hide the real walls and form the cave walls. I did this in Kiv’s cave, too, using six or seven copies of a very large rock that was cloned from a tree:
This is the “Desert Rock” by simsfan3ds from mts2, but unfortunately it is no longer available there. There are probably similar rocks available for download.
A third possibility would be to use neighborhood rocks, which unlike the Desert Rock have a beautiful texture even up close. If you get these small rocks from mts2 there is also a bonus mod included that allows you to place neighborhood decorations directly on lots. Sims can walk through neighborhood decorations if they appear on a lot. I have used this trick for several purposes already, including Iylaine’s swimming lesson and for Egelric’s castle (our next tour).
I have never built a cave this way, but I think it would be possible. In neighborhood view, arrange the rocks so they overlap to form a ring or other cave shape, then go to lot view and build a wall around them on the outside so that you can plop a roof on top and call it a cave.
The obvious disadvantage of this technique is that you can’t move your lot once it’s built, since the neighborhood rocks won’t come with it.
However, now that I have thought of it I want to try it out. I just need an excuse to make another cave…
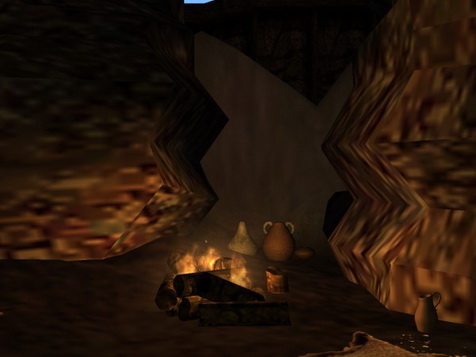
Back to Kiv’s cave, here is a shot of the entrance from the inside, with the roof and second story turned off:
There is an ordinary wall on that square since we can’t put doors on foundation walls. The ground at that point therefore needs to be exactly one wall-height from the top of the foundation so you can connect an ordinary wall to the foundation wall. Kiv’s cave is lower than one wall-height, so there is a sloping path from the entrance down into the cave.
The cave-like door is an arch from the mts2 Simstones set. They also have a similar arch that is 2 squares wide, as well as some hole-in-the-wall windows.
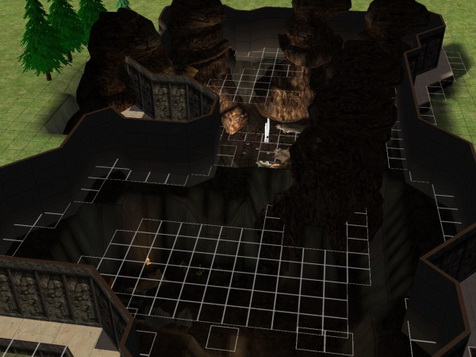
Here is a shot in build mode so you can see the grid, giving you an idea of the size of the cave. This shot is from Vash’s side looking back towards Kiv’s side:
I tried to find some good pictures of the interior of the cave from within the story, but there aren’t too many. Here is a complete (I think) list of chapters featuring the cave, up to March, 1085:
- Cat is saved from the curse of mice
- Cat tries to help Mouse
- The elf finds no fire
- Cat asks about her dream
- An elf is left alone
Cat tries to help Mouse seems to be the most brightly lit chapter showing off the construction of the cave, which I would consider a disadvantage in terms of the story. Given the approximative nature of cave-building in the Sims, the best cave is probably one that fades into the background.
So, my final advice is: use Gunmod’s Light mod, if you aren’t already, keep the walls and floors and roof very dark, keep the light focused on the Sims, and leave the rest of the cave in shadow. It’s more dramatic that way, anyway…


That is so cool. Thanks for sharing your knowledge with us.